Customized Ikea PAX

When we moved in together my husband and I swore never to buy any Ikea furniture. We just found it so sad that you’d find the same furniture everywhere, that everyone had that same BILLY bookshelf, etc.

But as much as we like to buy second hand, we’re not flea market experts and don’t have much time, nor money to get the nice vintage pieces we like.

So like everyone else, now that we need to prepare the nursery for the titch, or reflex is to just nip to ikea and find whatever functionnal wardrobe we can use. So we got the classic PAX unit, plain, white, does the job.

We got the cheapest door style, with the secret evil plan to customize it.

Few rolls of washi tape later, tadaaaa :

20140224-100103.jpg

I just let myself improvise with the colours and patterns of the tape, making up patterns as I went.
I love how each square of the door is different and complements the others. I also enjoy how they look a little bit like quilting.

It was such a fun project to make I’m itching to stick washi tape to every pièce of furniture we own.

Washable baby wipes DIY

Washable baby wipes can be a good alternative to disposable ones. They reduce waste, reduce packaging waste and are chemical and fragrance free if you choose the right baby product. Or so I hope anyway (baby’s not here yet so I haven’t tried). A friend uses them and loves them.
Washable wipes are à bit extensive for what they are so I ordered some organic fabric online and made them myself.

I chose to use 2 different types of terry because they have different feels to them and don’t absorb the same way. Bamboo is definitely softer but I like how cotton feels with baby lotion on it. Of course you can choose to use only one type, in which case you should double the amout you use.

Here is a little tutorial to make you own.

To make 40 wipes you need :

50 cm of organic cotton terry (in 150 cm)
50 cm of bamboo terry (in 150 cm)
Embroidery thread (you can use several colours) or coloured thread.

And your usual needles, scisors, fabric pen or chalk and a sewing machine.

First mark and cut fourty 12,50 x 15 cm rectangles in each fabric. Mark the 12,50 cm in the width of the fabric, 4 times and the 15 cm lengthwise.

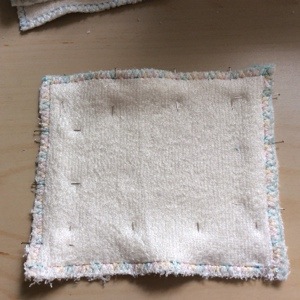
Then pin a rectangle of each fabric together, riche side facing out.

20140215-175441.jpg

Using interlock stitches on your machine, ses along the edges of your rectangles and all four sides, making sure both layers are trapped in the seam. It’s fun if you choose to vary the color of thread you use.

20140215-175529.jpg

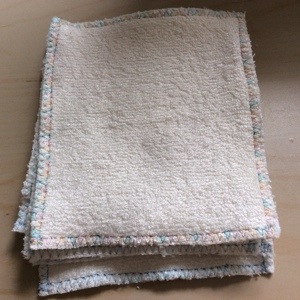
Then remove pins and cut the edges clean, making sure you don’t cut the seams. Wash several times and then iron (if you can bare to) before using your wipes.

20140215-175615.jpg

My tip : try to do all the cutting, then pinning, then sewing in one go. You’ll get way more efficient that way.

I tried to make some smaller ones to use instead of cotton pads to remove my make up. The sensation on my skin is quite different but also quite nice.

On creativity

Today, I’d like to talk a little bit (that’s a lie, this post is really long) about creativity, because I keep being reminded how it can be part of many different areas of one’s life, and I enjoy it every time.

My job is a creative one: I’m a dance artist and choreographer. I spend a lot of my time imagining projects, creatively responding to assignements, trying to facilitate someone else’s or my own artistic vision. And the medium that my creativity best expresses itself in is dance, movement and the body.

I really got into crafts a few years ago, when I had very little work as a dancer and really needed to acheive things and be creative. I needed to see the beginning and the end of one given project, in a much shorter amount of time than making a dance work would. So I started sewing and knitting more, I started taking pictures, cooking and generally making stuff.

Continue reading

20140207-102035.jpg

Petit Pan inspired blanket

Here’s just a quick picture of the blanket I made using Petit Pan bias. It’s so simple, just adding a cute printed bias turns a basic rectangle of fleece into a really cool blanket. I think this would make a perfect quick project for a gift to a friend with a newborn.